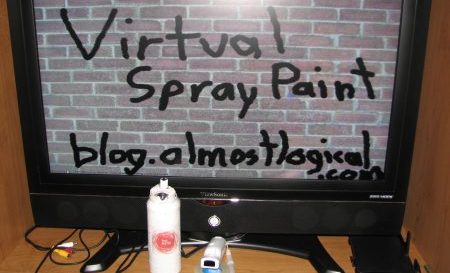
The Virtual Spray Paint experiment works by mashing many different ideas together. At the heart of it is the use of the Wiimote. In this experiment, two Wiimotes are synced to a computer using a bluetooth adapter. Using WiiFlash and WiiFlashServer, the Flash application reads information sent from the two Wiimotes. One Wiimote is placed into the mock spray paint can, which is used for a remote button press and for motion detection. The other Wiimote is positioned in front of the screen, pointed at the user. Mounted on top of the spray can is an IR emitter which the Wiimote near the screen sees and uses to detect it’s current position.
Continue reading for step-by-step instructions on how to build your own Virtual Spray Paint project, as well as the source code for this project.
Step 1 – Building the Spray Can
You can build your spray can however you want, but it must have the following features:
- Must be able to house a Wiimote inside of it.
- Have a infrared emitter mounted on top.
- A battery for powering the infrared emitter.
- A button mounted on top, that when pressed, strikes the Wiimote’s ‘B’ button.
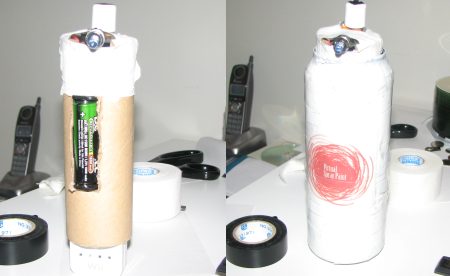
For my version, I fit the Wiimote inside of a cardboard tube and mounted the infrared emitter to the top of this tube. I placed the battery on the front of the tube. Using a small lid and a broken pencil, I created the spray button. Once complete, I placed the whole apparatus within one and a half pop cans that I taped together. A dime was placed in the bottom can to make the can make noise when shook.
The most important recommendation I have when building a spray can is to build it in such a way it can easily be taken apart. Since batteries will die, make it so they can be easily changed.
Step 2 – Setting up Wiimotes, Bluetooth Adapter and WiiFlash Server
For all necessary information and to download WiiFlash Server go to http://wiiflash.bytearray.org/ . They have forums setup to help you through this process.
I suggest setting it up on a Window XP machine as using Vista is still challenging.
Step 3 – Setting up the Project
- Using Flash, publish out a Projector file (.exe).
- Sync the two Wiimotes with your computer.
- Run WiiFlash Server (I am using version 0.4).
- After both Wiimotes have synced with WiiFlash Server, place Wiimote #1 in front of the screen, upside down, with the sensor facing towards yourself. For best results, it should be angled upward at a 25 degree angle and you should be between 4 – 10 feet away. Place Wiimote #2 inside your spray can.
- Turn on the IR emitter.
- Run VirtualSprayPaint.exe (currently it is hard-coded to 1024×768 resolution – you can change this if you wish).
- Have fun!
Step 4 – Using the Application
Hold down the spray button and move the spray can around in the 3D space in front of you to spray on the screen. As you spray, the pressure will decrease until it stops. Shake the can to increase pressure. If you would like to reset the application at any time, turn the spray can on it side for a few seconds until a message appears on screen.
You can download the source code here.
For videos of it in action check out my previous post.
Let me know think using the comments below.


1 Response to "Virtual Spray Paint – Part 2 DIY"
If you would like to grow your familiarity only
keep visiting this site and be updated with the hottest gossip posted here.