Blog

Interacting with Objects Unity3D

January 4, 2010 by Devin Reimer

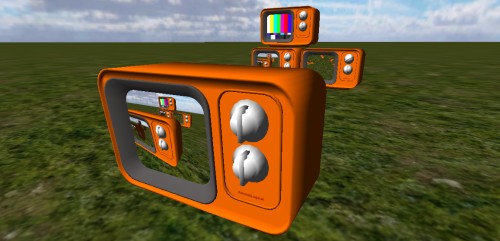
Interactive TV Demo Screenshot

If you missed the first part of this Unity3D series you can read it here.

This example demonstrates how to interact with with objects in Unity.

The mouse cursor was removed and replaced with a cursor in the middle of the screen similar to an FPS. When this cursor is over an object that support interactivity, the cursor changes and the GUI will display a message based on the possible interaction. This is achieved by creating an abstract class called ‘Interactive’ with two abstract functions GetInteractionMessage() and Interact(). All interactive objects will inherit this class and support these two functions.

Within the Update() in the GUI class a Physics.Raycast is done using a ray moving outward from the center of the screen. This returns the first GameObject in which this ray collides. Then it tests to see if this object or a parent of this object has a component of type ‘Interactive’. If type ‘Interactive’ is detected it then can retrieve information about the possible interaction or if the left mouse button is down tell this object to perform an action.

In this example clicking on each TV changes its channel (based on multiple materials) and rotates its dial.

As you may have noticed the TV model has received a significant upgrade. A thanks goes out to Calin Reimer for creating this new model.

Hints and Gotchas:

  • Use an abstract class as the parent class for all interactive objects, this way you won’t have to rewrite the basic interaction code for each object. This method also make detection a lot easier.
  • To create a Ray moving outward from the center of the screen, use the following code: Camera.main.ScreenPointToRay(new Vector3(Screen.width/2,Screen.height/2));
  • Use layers to have certain materials ignore light sources (ie. TV Screen), then use a Self-Illumin shader to brighten this material.
  • If you can get someone else to model for you, do it. It speeds up development :)

To check out the demo click here.

To get the source (unitypackage) click here.

Source Requirements: Unity 2.6, but you will still need Unity Pro to use the Render Texture feature.
Render to Texture Unity3D

December 11, 2009 by Devin Reimer

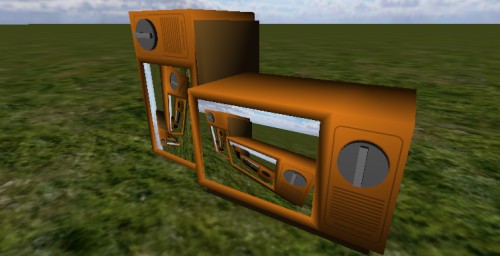
Render Texture TV Demo Screenshot

I’ve been working with Unity for a while now so this article was long overdue. Initial I was planning on doing some entry level stuff, like what is a Rigidbody, adding materials, etc. As more and more good video tutorials began appearing online I decided that I would do something a little more advanced than that. Don’t worry it not much more advanced.

I recently purchasing Unity Pro and have been digging into some Pro only features. One of my favorites so far is Render Textures. Render Textures simply put allows you to render the output of a camera to a texture. More detail on Render Textures can be found here

For this example I modeled a TV in Blender (don’t laugh at the model it is my first) with an empty space for where the screen would be.

Steps in Creating a Working TV That Displays What You See.

  1. Add basic environment objects (ground, skybox, First Person Controller,lights etc)
  2. Import a tv model into Unity and place it within the scene
  3. Create a plane within Unity and position it within the TV model to be used as the TV screen (using Render Texture with planes is easiest).
  4. Right click within the Project panel to create a ‘Render Texture’
  5. Add a second camera as a child to the ‘Main Camera’ within the First Person Controller.
  6. Set the ‘Target Texture’ property of this camera to the newly created Render Texture.
  7. Add this texture to a material
  8. Add this material to the tv screen
  9. Hit play and you should have a working TV

Hints and Gotchas:

  • You will need to rotate the render camera 180 degrees on its z-axis so that it will render the scene the right way up Update: Incorrect, looks like I had my rotations messed up. If the plane you are rendering to is rotated correct the render material will appear the right way up.
  • You will need to use at a least two cameras when using Render Texture because the camera that is rendering to screen can not also render to a texture
  • If you have added a Skybox to your main camera you will need to add this Skybox to the render camera(s).
  • If you have multiple cameras it may be easier to set the Skybox material within Render Settings instead of setting each camera’s skybox individually.

To check out the demo click here

To get the source click here

Source Requirements: You will need need Unity Pro to use the Render Texture feature.

Update: I have released an update version of this demo that includes object interaction. http://blog.almostlogical.com/2010/01/04/interacting-with-objects-unity3d/