Blog

Unity to Flash Exporter with iTween

December 22, 2011 by Devin Reimer

If you didn’t already know Unity 3.5 Developer Preview is now available to the public.
http://unity3d.com/unity/preview/

To me the most exciting thing in the developer preview is the Unity to Flash exporter. The ability to easily create and distribute 3D content on the web without needing the user to have a different plugin.

So the first thing I did was start to port over some older projects. As this is an early build there are a lot of limitations, so moving an existing complex project over isn’t an easy task. One of the major stumbling blocks I had (and from the sounds of things a lot of people are having) is that iTween simply doesn’t work.

iTween is great framework for doing tweening in Unity. So I decided that with my deep knowledge of Unity, iTween and AS3 I would attempt to ‘fix’ the iTween libary to work with the Flash exporter.

Turns out iTween uses a lot of unsupported features and that coupled with the exporter being very new, turned this into a very challenging problem.
45+ hacks and a lot of knowledge later, I won.

Without further ado here is Flash export ready version of iTween: iTween.cs

Here is a quick demo proving it works: SimpleCrateDemo

This version of iTween is a little rough around the edges, but it works in my initial tests.

Known Issues

-ColorTo & ColorFrom are unsupported as they cause an infinite loop (reason unknown)
-FadeTo & FadeFrom are unsupported as they cause an infinite loop (reason unknown)
-Flash player throws a silent error on Destroy of iTween component (should not effect anything but will show up in Flash debug)

There are probably more issues so let me if you come across any.

I do know that a new version of iTween is being worked on and the Flash exporter is in an early state so this is a temporary version to hold everyone over.

PS: This took me an entire day, so if someone uses this to win the Unity ‘Flash in a Flash’ contest you official owe me a drink. :)

Unity Editor Lesser Known Features

December 19, 2011 by Devin Reimer

The other day I discovered a sweet feature in Unity that has existed for a long time. With this I decided to create a short list of some cool features in the Unity editor that you might not be aware of.

1) Inspector Lock – At the top of the inspector panel there is a small ‘lock’ icon. This locks the inspector to currently selected GameObject. This is great for things like adding GameObjects to arrays. 
http://unity3d.com/support/documentation/Manual/Inspector%20Options.html

2) Multiple Inspectors – Click the ‘context menu’ icon (next to the ‘lock’ icon) in the inspector. In that drop down, select ‘Add Tab’, then ‘Inspector’. Use in conjunction with inspector lock to become a productivity machine.
(via @AngryAnthttp://twitter.com/#!/AngryAnt/statuses/142724785384865793)

3) Project and Hierarchy Search By Type – Not only can you search for items by name, but also by type. To do this, click the ‘Search’ icon drop down and select ‘Type’. Or to be more efficent, simply type ‘t:type’. Ex: t:texture, t:material, etc.
(via @aras_phttp://twitter.com/#!/aras_p/status/143010880706183168)

4) Inserting and Deleting Items From Arrays In Inspector – Populating arrays using the Unity editor is very handy, that is until you realize that you need to remove or add an item in the middle of the array. It might appear that there is no way to do this, but there is. To duplicate an item, select it and hit Ctrl-D (Windows), Command-D (Mac). To delete an item, hit Shift-Delete twice (once to clear, second time to remove it)

5) Creating New Line in Inspector Text Input – On a Mac simply hit Option-Return to create a new line. On Windows this functionality is…’missing’. Normally you would have to copy and paste a new line for somewhere else. :(
As this is kind of lame, I wrote a Unity editor script to fix this. Simply create a folder in your project called ‘Editor’ and drop this script (InsertNewLine.cs) into it.
Now you can simply hit Alt-Enter on Windows to create a new line. :)
http://answers.unity3d.com/questions/43424/multi-lining-or-line-breaks-for-the-inspector-wind.html & http://blog.almostlogical.com/resources/InsertNewLine.cs

6) Creating a Prefab Quickly – Simply create your GameObject in the Hierarchy and drag it down into the Project panel. Instant prefab!
http://blogs.unity3d.com/2011/03/25/ninjacamp-iii-quick-prefabs/

7) Editing Primitive Collider Dimensions in Scene View – Select a GameObject with a collider and hold down the shift key. Small greens squares will appear in the Scene View which you can then manipulate.
http://unity3d.com/unity/whats-new/unity-3.4.html

8) Adding Game & Scene View Icons to GameObjects – Click on the GameObjects icon in the inspector. From this drop down you can select the icon type, color and even create a custom icon. You can also add icons to custom scripts. Select the script in the Project panel. Then click it’s icon in the inspector. This icon will get applied to all GameObjects that have this script attached. This is very handy for marking things like waypoints.
http://unity3d.com/support/documentation/Manual/Gizmo%20and%20Icon%20Visibility.html

9) Snap To Vertex or Collider – To snap to vertex, hold ‘V’ and then click and hold down on the desired vertex. Drag your mouse around to snap it to the required vertex of another mesh. To snap to collider, hold Shift while dragging in the center when using the Translate tool.
http://unity3d.com/support/documentation/Manual/Positioning%20GameObjects.html

10) Scripting the Editor – This is one of my favourite features and something people do not do enough of. If there is something the Unity editor doesn’t do by default you can write it yourself. Extending the editor is very easy and incredibly powerful. As an example I wrote a tool called PlayModePersist that can save changes your made in the editor while in PlayMode.
http://unity3d.com/support/documentation/Components/gui-ExtendingEditor.html

If you have any additional items you would add please put them in the comments below.

Maze Mover Launch (iPad and PlayBook) – Developed with AIR

September 20, 2011 by Devin Reimer

I’m very excited to announced my first fully featured indie game, Maze Mover has finally launched. It is now available for both iPad and PlayBook.

I’ve been working on this game on and off since December with the help of Calin Reimer.

I developed the first and second prototype of Maze Mover using Flash. When both prototypes were successful I expected I would move onto something different to develop it (either Unity or Corona). But with the progress made with AIR (AIR 2.6 and then AIR 2.7), I decided to give AIR a try.

I couldn’t be happier with the final result. Maze Mover turned out to be the perfect game for AIR. I might do a more detailed article on the development of Maze Mover in the future.

If you  happen to be in the Winnipeg area on Thursday (Sept 22) swing by Demo Camp. Here I will be doing a talk on the development of Maze Mover.  http://newmediamanitoba.com/events/180/democamp

What are you waiting for, get Maze Mover today!
iPad – http://itunes.apple.com/us/app/maze-mover/id458547694?ls=1&mt=8
PlayBook – https://appworld.blackberry.com/webstore/content/55013
Maze Mover Website and Trailer – mazemover.com

Interactive Augmented Video – On-Rails Shooter Tech Demo

July 21, 2011 by Devin Reimer

The concept, create an interactive 3D scene by augmenting video not shot from a fixed point. The idea came from old arcade on-rails shooters. I wanted to know if you could shoot a video of an environment for an on-rails shooter and then add interactive 3D models at run-time in such a way that everything seamlessly fit together. I’ve seen this attempted in the past, but the camera would always have to stop moving when the scene became interactive. On the other end is Augmented Reality, where generally it is real-time video with a fixed point.

With the help of Calin Reimer(modeling & art) and Kert Gartner(video and camera tracking) we managed to build a working tech demo this last weekend at PegJam.


Now onto the cool part, how did we achieve this.

First we found a suitable area to shoot the video (interesting but not too cluttered). We then shot a short video moving the camera around the environment.

This video was then brought into a piece of camera tracking software where the scene was tracked. This then gave us the position and path of the camera during the whole video. This was exported as an FBX file and the video was converted to an image sequence.

A rough 3d model of the scene including all objects in the environment was created.

The image sequence, camera track and 3D scene model where then all brought into Unity.

Within Unity a static orthographic camera was setup to view a plane scaled to the video’s dimensions. The current time was used to determine the current video frame and this video image would be added to the plane. This creates a video player that while a little slow, has the required control needed for the project. As a note we did attempt to use Unity’s built-in MovieTexture but it was just not robust enough for this project.

Next a new camera was added into the main camera tracking node. This allows that camera to follow the exact same path the real camera did when we shot the scene. The camera’s “Field Of View” was also modified to closely match that of the actual camera.

The camera tracking animation could not just be played like a normal animation. The problem was this would move the camera into between video frames causing alignment issues. Instead the camera’s animation was manually played based on the current frame of the video.

The 3D model of the scene was position within the camera track. Box Colliders were added and a custom shader that occludes all objects behind it was applied. Lights were placed in the scene to roughly match the actual lighting in the environment.

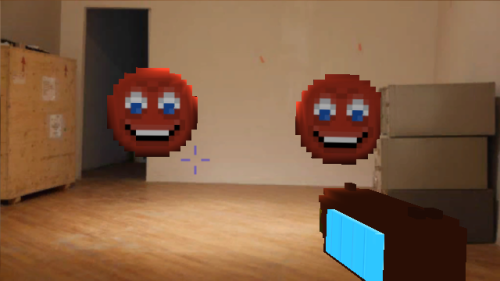
Lastly we added the remaining items like the gun, laser, laser mark decals and enemies.

We render the camera that captures the video first, followed by the 3D scene camera and lastly the camera that renders the gun.

When it is all played together it works to give you the illusion that everything actually exists in that scene.

I’ve very excited of what we were able to accomplish in one weekend. If you are interested you can download the project source below. A quick word of warning as we built everything in one weekend this project is a bit crazy.

To get the source (unitypackage) click here.

If you missed it above click here to play the tech demo.

“Your Game is Way Too Hard!”

June 24, 2011 by Devin Reimer

“Your Game is Way Too Hard!” This was something I found myself saying quite a bit during the So Many Rooms Game Jam.

To start, this post is not a knock against anyone that submitted rooms to So Many Rooms. I was very impressed with the quality and variety of games submitted. This just alerted me to a widespread trap new game developers often fall into. Making their games way too hard.

So why do game developers make their games too hard/too difficult? I believe it is a bunch of different factors:

  1. Looking more at games of the past than games of the present (older games were harder).
  2. The thought that difficultly is what makes a good game.
  3. Try to extend the length of a game by making it harder.
  4. Thinking you can tell how hard/difficult your own game is.

The problems with those points:

  1. Games of the past were generally harder because of tech limitations, monetization and fewer good examples not because they were magically better. Also we sometimes look at those games with rose-colored glasses.
  2. Difficultly in general has little to do with being a good game. I will argue in most cases making your game easier will make it better.
  3. This is partly true, the harder you make your game the longer it would take a ‘person’ to beat it. The problem is in reality people rarely beat games and making a game longer doesn’t make it better.
  4. Game developers NEVER know how hard their own games are without first watching someone else play it. You built the game and have played it thousands of times. You are a master, not an average player.

So Many Rooms was an interesting project because the goal of each room was to be short so that the player could move on to the next room. Unfortunately I didn’t drive this point home hard enough, which caused most people to make rooms that were long and hard to beat.

Some stats from So Many Rooms:

Number of Unique Players: 14,353
Rooms Started: 103,308 (take with a grain of salt as users might have seen but not played the room)
Rooms Completed: 8,868

The most important take away from these stats is that the maximum percentage of people that could have beat a single room is 62%. That is the maximum as there are lots of players (myself included) that beat a lot more than one room.

Breakdown Per Room of Number of Times Completed (each room was played roughly same amount of times)

Back From a Cleaning 788
the BeBop Room 525
How The World Ends 453
Fly and Shoot 424
Are you satisfied? 388
Brownian Motion 365
Golden Man 2 363
Roomtroid 338
Golden Boy vs Lasers 337
You are not dreaming, messenger 335
Find the Wheat to Leave 292
Enigma of a Night 290
Strike! – The Bonus Round 287
Golden Space Opera 233
Heliphant Flight 232
Creepy Complex 222
Weather Breaker 212
Brocken 205
Ditto Lake 192
The Italian Room 188
Anything but Zombie LOLcats 187
Mercury’s Hell 177
In the Streets 173
Lava Temple 171
Hall of Contradictions 153
My Deer Golfy 146
Briciola Rooom 134
Crawl Of Shame 131
Bovine Climb 126
Pixel Flight 117
Parasite 97
Gem Of Flying Wonders 96
Ghost Golden Boy 84
Gauntletkaruga 81
Box of God 73
Space Shooter Room 71
The Ascent 63
A Walk In The Park 54
Black Out 38
Sunless 8

So while I’m not saying beating a game is a requirement for a game being good (it’s not). What I want to explain is making a hard game good is more challenging that making an easy game good. On top of that the harder your game is the less accessible it will be. So if you are new to game development make it easier on yourself, make an “easy” game.

Two of my favorite hard indie games of recent memory are Trials HD and Super Meat Boy. Both games are insanely difficult. The difference between the two is that I think Trial HD was too hard. Game reviews agree with me. So I would argue the worst thing about that game was its difficult. Which means if they would have made it a bit easier it would have been a better game.

Now Super Meat Boy was hard….very hard. The difference came down to tuning, making it just challenging enough to keep you moving on without having you rage quit. This is a very rare quality and very hard to do.  Team Meat wrote a great article on how they did this. http://supermeatboy.com/13/Why_am_i_so____hard_/#b

Even in the case of Super Meat Boy I’m certain I wouldn’t have liked the game less had the difficulty been dialed back a little bit. I did beat the Dark World, which I feel is an accomplishment, but had it been a bit easier, I’m certain I would not feel less accomplished.

In the Super Meat Boy article above they give a simple formula for determining what the difficultly of a game is:

(% chance the player will die) X (Penalty for dying) = Difficulty?

This is a great formula. The problem with it, is that while the penalty for dying is easy for a game developer to see, the % chance the player will die is not easily determined.

The problem with judging games difficult from the game developer’s perspective is during the process of building a game you end up playing it a lot. This makes you way better than anyone playing your game for the first time.

A quick rule of thumb as a new game developer if you are playing your own game and find it challenging your game is already way, way too hard. The best way to test this is to give the game to someone that hasn’t seen it before and is part of your target demographic. Just watch them play it and don’t speak. It is very important that you don’t speak, as the moment you do you have invalidated the test. In the real world you won’t be next to each player playing the game. If you become uncomfortable watching some struggle with your game you have something you need to fix. Once you made some fixes do not give the game back to the same person. You must find a new person(s) and test again. You are doing a great disservice to yourself and users if you do not go through this process before you release a game.

A must read presentation by Jason Kapalka(Popcap Games) titled: “10 ways to make a bad casual game” – http://www.casualconnect.org/content/gamedesign/kapalka-tenways.html. The number one item is about making your game too hard. An important quote: “No casual game has ever failed for being too easy.” I think you could remove the word ‘casual’ and minus a few exceptions it would hold true.

It is easier to make a good game that is easy, than it is to make a good game that is hard game. Being a new game developer, people will be playing your games for entertainment and there is nothing entertaining about quitting a game out of frustration over difficulty.

Going forward I’m going to try to do a better job conveying this message to people new to game development.

Making a game not ‘Too Hard’ is sometimes not easy to do. I’m currently struggling with this very problem on my current game, which means I have a lot of user playtesting and tuning left to do.

I would love to see people’s opinions on this article, please leave some comments below.

PlayModePersist Version 1.5 – Unity Asset Store

April 19, 2011 by Devin Reimer

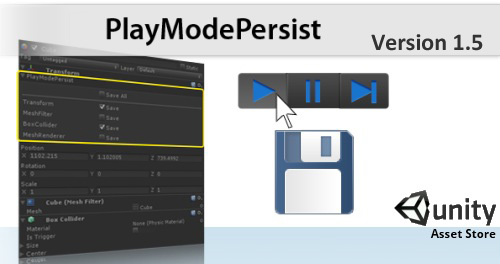
A new release (v1.5) of PlayModePersist is now available for download in the Unity Asset Store – http://u3d.as/content/almost-logical-software/play-mode-persist/1tS.

PlayModePersist is a Unity Extension that allows you to persist changes you make in the Unity Editor while in Play mode. To learn more about it your can read my original blog post:  http://blog.almostlogical.com/2011/01/11/playmodepersist-unity-asset-store/

Thanks to some great feedback from users I’ve added a bunch of new features and a few fixes.

What is new in Version 1.5

  • Shortcut key : Open/closing the PlayModePersist dropdown : Shift+Alt+O
  • Shortcut key : Persisting all components within selected GameObject : Shift+Alt+P
  • Auto Persist Settings – Ability to search for and add components you would like to always auto persist in all your projects (Window -> PlayModePerist Auto Persist Settings)
  • Bug Fix : Issue persisting multiple GameObjects at the same time
  • Bug Fixes : Cleaning up warning and error messages that can occur since Unity 3.2

These new features make PlayModePersist not only easier to use, but should save you a lot more time.

If you already own PlayModePersist this update is free simply download the update. If you haven’t yet pick up a copy, what are you waiting for? Download it now: http://u3d.as/content/almost-logical-software/play-mode-persist/1tS