Blog

Unity to Flash Exporter with iTween

December 22, 2011 by Devin Reimer

If you didn’t already know Unity 3.5 Developer Preview is now available to the public.
http://unity3d.com/unity/preview/

To me the most exciting thing in the developer preview is the Unity to Flash exporter. The ability to easily create and distribute 3D content on the web without needing the user to have a different plugin.

So the first thing I did was start to port over some older projects. As this is an early build there are a lot of limitations, so moving an existing complex project over isn’t an easy task. One of the major stumbling blocks I had (and from the sounds of things a lot of people are having) is that iTween simply doesn’t work.

iTween is great framework for doing tweening in Unity. So I decided that with my deep knowledge of Unity, iTween and AS3 I would attempt to ‘fix’ the iTween libary to work with the Flash exporter.

Turns out iTween uses a lot of unsupported features and that coupled with the exporter being very new, turned this into a very challenging problem.
45+ hacks and a lot of knowledge later, I won.

Without further ado here is Flash export ready version of iTween: iTween.cs

Here is a quick demo proving it works: SimpleCrateDemo

This version of iTween is a little rough around the edges, but it works in my initial tests.

Known Issues

-ColorTo & ColorFrom are unsupported as they cause an infinite loop (reason unknown)
-FadeTo & FadeFrom are unsupported as they cause an infinite loop (reason unknown)
-Flash player throws a silent error on Destroy of iTween component (should not effect anything but will show up in Flash debug)

There are probably more issues so let me if you come across any.

I do know that a new version of iTween is being worked on and the Flash exporter is in an early state so this is a temporary version to hold everyone over.

PS: This took me an entire day, so if someone uses this to win the Unity ‘Flash in a Flash’ contest you official owe me a drink. :)

Unity Editor Lesser Known Features

December 19, 2011 by Devin Reimer

The other day I discovered a sweet feature in Unity that has existed for a long time. With this I decided to create a short list of some cool features in the Unity editor that you might not be aware of.

1) Inspector Lock – At the top of the inspector panel there is a small ‘lock’ icon. This locks the inspector to currently selected GameObject. This is great for things like adding GameObjects to arrays. 
http://unity3d.com/support/documentation/Manual/Inspector%20Options.html

2) Multiple Inspectors – Click the ‘context menu’ icon (next to the ‘lock’ icon) in the inspector. In that drop down, select ‘Add Tab’, then ‘Inspector’. Use in conjunction with inspector lock to become a productivity machine.
(via @AngryAnthttp://twitter.com/#!/AngryAnt/statuses/142724785384865793)

3) Project and Hierarchy Search By Type – Not only can you search for items by name, but also by type. To do this, click the ‘Search’ icon drop down and select ‘Type’. Or to be more efficent, simply type ‘t:type’. Ex: t:texture, t:material, etc.
(via @aras_phttp://twitter.com/#!/aras_p/status/143010880706183168)

4) Inserting and Deleting Items From Arrays In Inspector – Populating arrays using the Unity editor is very handy, that is until you realize that you need to remove or add an item in the middle of the array. It might appear that there is no way to do this, but there is. To duplicate an item, select it and hit Ctrl-D (Windows), Command-D (Mac). To delete an item, hit Shift-Delete twice (once to clear, second time to remove it)

5) Creating New Line in Inspector Text Input – On a Mac simply hit Option-Return to create a new line. On Windows this functionality is…’missing’. Normally you would have to copy and paste a new line for somewhere else. :(
As this is kind of lame, I wrote a Unity editor script to fix this. Simply create a folder in your project called ‘Editor’ and drop this script (InsertNewLine.cs) into it.
Now you can simply hit Alt-Enter on Windows to create a new line. :)
http://answers.unity3d.com/questions/43424/multi-lining-or-line-breaks-for-the-inspector-wind.html & http://blog.almostlogical.com/resources/InsertNewLine.cs

6) Creating a Prefab Quickly – Simply create your GameObject in the Hierarchy and drag it down into the Project panel. Instant prefab!
http://blogs.unity3d.com/2011/03/25/ninjacamp-iii-quick-prefabs/

7) Editing Primitive Collider Dimensions in Scene View – Select a GameObject with a collider and hold down the shift key. Small greens squares will appear in the Scene View which you can then manipulate.
http://unity3d.com/unity/whats-new/unity-3.4.html

8) Adding Game & Scene View Icons to GameObjects – Click on the GameObjects icon in the inspector. From this drop down you can select the icon type, color and even create a custom icon. You can also add icons to custom scripts. Select the script in the Project panel. Then click it’s icon in the inspector. This icon will get applied to all GameObjects that have this script attached. This is very handy for marking things like waypoints.
http://unity3d.com/support/documentation/Manual/Gizmo%20and%20Icon%20Visibility.html

9) Snap To Vertex or Collider – To snap to vertex, hold ‘V’ and then click and hold down on the desired vertex. Drag your mouse around to snap it to the required vertex of another mesh. To snap to collider, hold Shift while dragging in the center when using the Translate tool.
http://unity3d.com/support/documentation/Manual/Positioning%20GameObjects.html

10) Scripting the Editor – This is one of my favourite features and something people do not do enough of. If there is something the Unity editor doesn’t do by default you can write it yourself. Extending the editor is very easy and incredibly powerful. As an example I wrote a tool called PlayModePersist that can save changes your made in the editor while in PlayMode.
http://unity3d.com/support/documentation/Components/gui-ExtendingEditor.html

If you have any additional items you would add please put them in the comments below.

Interactive Augmented Video – On-Rails Shooter Tech Demo

July 21, 2011 by Devin Reimer

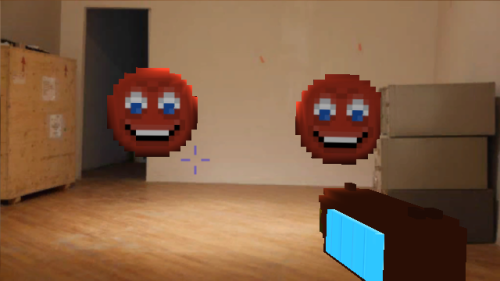
The concept, create an interactive 3D scene by augmenting video not shot from a fixed point. The idea came from old arcade on-rails shooters. I wanted to know if you could shoot a video of an environment for an on-rails shooter and then add interactive 3D models at run-time in such a way that everything seamlessly fit together. I’ve seen this attempted in the past, but the camera would always have to stop moving when the scene became interactive. On the other end is Augmented Reality, where generally it is real-time video with a fixed point.

With the help of Calin Reimer(modeling & art) and Kert Gartner(video and camera tracking) we managed to build a working tech demo this last weekend at PegJam.


Now onto the cool part, how did we achieve this.

First we found a suitable area to shoot the video (interesting but not too cluttered). We then shot a short video moving the camera around the environment.

This video was then brought into a piece of camera tracking software where the scene was tracked. This then gave us the position and path of the camera during the whole video. This was exported as an FBX file and the video was converted to an image sequence.

A rough 3d model of the scene including all objects in the environment was created.

The image sequence, camera track and 3D scene model where then all brought into Unity.

Within Unity a static orthographic camera was setup to view a plane scaled to the video’s dimensions. The current time was used to determine the current video frame and this video image would be added to the plane. This creates a video player that while a little slow, has the required control needed for the project. As a note we did attempt to use Unity’s built-in MovieTexture but it was just not robust enough for this project.

Next a new camera was added into the main camera tracking node. This allows that camera to follow the exact same path the real camera did when we shot the scene. The camera’s “Field Of View” was also modified to closely match that of the actual camera.

The camera tracking animation could not just be played like a normal animation. The problem was this would move the camera into between video frames causing alignment issues. Instead the camera’s animation was manually played based on the current frame of the video.

The 3D model of the scene was position within the camera track. Box Colliders were added and a custom shader that occludes all objects behind it was applied. Lights were placed in the scene to roughly match the actual lighting in the environment.

Lastly we added the remaining items like the gun, laser, laser mark decals and enemies.

We render the camera that captures the video first, followed by the 3D scene camera and lastly the camera that renders the gun.

When it is all played together it works to give you the illusion that everything actually exists in that scene.

I’ve very excited of what we were able to accomplish in one weekend. If you are interested you can download the project source below. A quick word of warning as we built everything in one weekend this project is a bit crazy.

To get the source (unitypackage) click here.

If you missed it above click here to play the tech demo.

PlayModePersist Version 1.5 – Unity Asset Store

April 19, 2011 by Devin Reimer

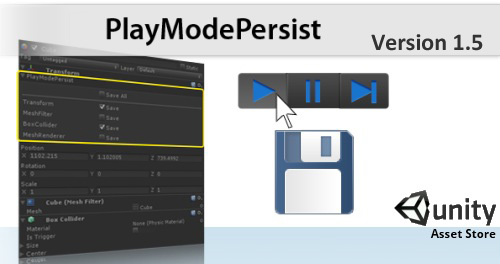
A new release (v1.5) of PlayModePersist is now available for download in the Unity Asset Store – http://u3d.as/content/almost-logical-software/play-mode-persist/1tS.

PlayModePersist is a Unity Extension that allows you to persist changes you make in the Unity Editor while in Play mode. To learn more about it your can read my original blog post:  http://blog.almostlogical.com/2011/01/11/playmodepersist-unity-asset-store/

Thanks to some great feedback from users I’ve added a bunch of new features and a few fixes.

What is new in Version 1.5

  • Shortcut key : Open/closing the PlayModePersist dropdown : Shift+Alt+O
  • Shortcut key : Persisting all components within selected GameObject : Shift+Alt+P
  • Auto Persist Settings – Ability to search for and add components you would like to always auto persist in all your projects (Window -> PlayModePerist Auto Persist Settings)
  • Bug Fix : Issue persisting multiple GameObjects at the same time
  • Bug Fixes : Cleaning up warning and error messages that can occur since Unity 3.2

These new features make PlayModePersist not only easier to use, but should save you a lot more time.

If you already own PlayModePersist this update is free simply download the update. If you haven’t yet pick up a copy, what are you waiting for? Download it now: http://u3d.as/content/almost-logical-software/play-mode-persist/1tS

Office Zombie Simulator on Kongregate

February 20, 2011 by Devin Reimer

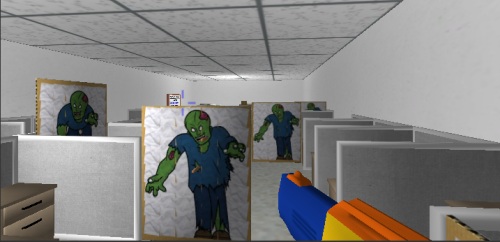
I’m happy to announce the release of our new game Office Zombie Simulator. This game was created by Calin Reimer and myself for Kongregate’s Unity Game Contest.

While it is still a work-in-progress I am very happy with how it turned out considering how swamped I was this last month (So Many Rooms and client work).

When I heard the announcement for Kongregate’s Unity Game Contest I was very excited and knew I needed to create something for it. I love game development contests because they have a great feature; a fixed deadline.

The premise of “Office Zombie Simulator” is pretty simple, imagine a few zombie loving nerds are stuck in an office for the weekend. Instead of working they decide to setup the ultimate zombie apocalypse simulator.

The idea for “Office Zombie Simulator” came to me out of necessity.

One problem that we keep running into with developing 3D content is the amount of time and effort required to build all the necessary 3D models. So the idea was if we could reuse more models between projects we would save development time. Since another project we were working on required office equipment I thought if this game could be set in an office, we could hit two birds with one stone.

Other than that the game shouldn’t have any complex 3D models or animations (too time consuming) and needed to be easy to pick up and play.

After a few days of brainstorming, the concept for “Office Zombie Simulator” was born. It turned out to be a very cool concept and is more proof that creativity works best under constraints.

So give it a try, leave feedback and please rate.

http://www.kongregate.com/games/AlmostLogical/office-zombie-simulator

We are hoping enough people will enjoy the game to warrant us building a fully realized version. We have a lot of cool ideas that we would love to implement.

PlayModePersist – Unity Asset Store

January 11, 2011 by Devin Reimer

Have you ever wanted to make changes to a component in Unity while in Play mode and have them persist after you click stop? Have you ever accidentally made changes to a component while your game was playing and wish they could be saved?

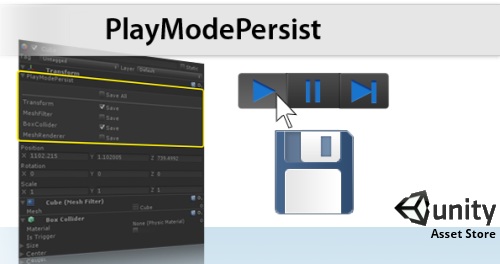
After a lot of hard work I’m happy to announce ‘PlayModePersist’ is now available in the Unity Asset Store.

This Unity extension allows you to select which components on individual GameObjects you wish to persist and they will save automatically the moment you hit stop. No needed to copy and reapply your changes, no worrying about a “clipboard” being full. You are not limited to saving one component or one GameObject, you can persist as many component from as many GameObject as you would like.
Works with all component with script access including, Transform, Rigidbody, Physics Colliders and Joints, etc. Also supports custom built components. Complete list of supported components.

This feature is currently the #3 most requested editor feature and #10 most requested overall on feedback.unity3d.com.

Best of all it is easy to use, while in Play mode just click the ‘PlayModePersist’ dropdown below the Transform title in the inspector and click the checkboxes for the component you wish to persist. Once you click stop their current state will be persisted.

Please use the comment section below to let me know what you think. Also giving it a rating in the Unity Asset Store would be greatly appreciated.

Note: If you don’t know how to use/access the Unity Asset Store, simply open up Unity, click Window->Unity Asset Store. You can find this item under ‘Extensions’.

Update: New link to PlayModePersist: http://u3d.as/content/almost-logical-software/play-mode-persist/1tS

Special thanks goes out to Kevin Evans for his work that went into this extension.