Blog

Flash Developer to Unity3D Developer – Where should I begin?

November 6, 2009 by Devin Reimer

Flash Developer To Unity Developer

I’m a Flash Developer and a few months ago I decided to start doing Unity development. If you don’t know what Unity is or why I am developing in it, you can read about my decision to start working with Unity in my previous post.

Before I start posting example projects and code for Unity, I thought I would put together some steps on what I think would be the best way to learn Unity if you are a Flash Developer.

1. First download Unity (it’s now free) and play around with the pre-installed demo.

2. Learn the Unity interface basics.
http://unity3d.com/support/documentation/Manual/Learning%20the%20Interface.html

3. Watching the first three video tutorials in the ‘Unity for Flash Developers‘ series by the guys over at Ethical Games.
The other videos are also good, but I think one should get a little more experience with Unity before watching them.

4. While this may sound stupid, stop working with Unity and learn Blender (or another piece 3D model software). I wish I would have learned basic Blender skills earlier then I did. I found that not being able to create basic models was a major sticking point even when all I wanted to do was code.
I would recommend going through ‘Blender 3D: Noob to Pro‘ wiki tutorials.

If you read up until ‘Detailing Your Simple Person 2’ in Chapter Two you should have the skills required to work within Unity a little more comfortably. Once you become more familiar with Unity I would then carry on with the tutorials from where you left off.
Note: I found the learning curve for Blender insanely steep, so chances are you will to. Don’t lose hope to soon as after a little while Blender does become second nature even for a programmer like myself.

5. If you don’t already know C#, learn the basics. There are lots of general C# tutorials and they are pretty easy to find. I recommend coding in C# instead of Javascript as it is a much more robust language and will lead to a more structured project. While coming from a AS3 background it may seem like Javascript would be the logical choice, don’t be fooled. Spend the time and learn C#.

6. Get a copy of Visual Studio Professional and it you don’t know how to use it, learn it. Unity 2.6 now has Visual Studio integration which will save you a lot of time.

7. Go through the Official Unity FPS tutorials and convert them from Javascript to C#.
http://unity3d.com/support/resources/tutorials/fpstutorial
It’s hard to learn how something works by just copying and pasting. That is why I found converting these tutorials from Javascript to C# very helpful in learning how to code in Unity.

8. Follow the community on Twitter. Great tutorials, links and information are just a few follows away.

9. Go crazy and have fun. While learning Unity might take you a little while the process and final result are both very rewarding.

Finally if something helped you go from Flash Developer to Unity3D Developer and I haven’t mentioned it here, add a comment below.
Real-time Webcam Head Tracking with Speech Balloon

May 16, 2009 by Devin Reimer

I have been doing some experiments with head and eye tracking within flash for the last few months. Just recently I discovered a open source port of a head tracking library called Marilena. This is yet another amazing library from the Spark Project. This library takes care of most of the hard work when it comes to head tracking, but it is does not natively support video.  So once I got these library to work with my application it ran at about 4 fps. The good part was the head tracking algorithm was much better than anything I had created. Some tweaks later I got the application to around 18 fps. Which is better but still not acceptable. So after some searching I found an article by a guy named Mario Klingemann from over at Quasimondo. He had added some performance enhancements to the Marilena library. (Check out his article here). This got my application up to around 22 fps, which was much closer to where I wanted it. Finally I wrote a little function the cuts down the search area depending on if head has been found on the last time around, this at last got the frame rate up to 27 fps, which is completely usable.

This application allows you to type text into a text area which then gets updated into the speech balloon which is positioned directly above your head in the webcam video.

To try out the demo (webcam required) click here.

To get the source click here

JigLibFlash Object Rotation – Pitch, Yaw and Roll

March 27, 2009 by Devin Reimer

JigLibFlash Rotation Example Screenshot

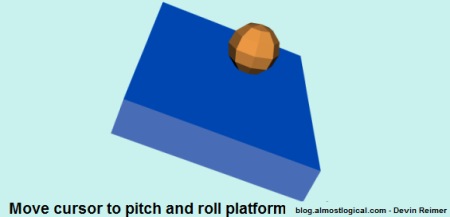
I get asked the following question a lot: “How do I rotate a JigLibFlash object?”. I do understand why people have this question as rotating pieces of geometry in JigLibFlash is not very straight forward. It also can end up being kind of challenging if your not familiar with exactly how rotation matrix work. The bottom line is it is not as easy as Papervision3D ( ex: pitch(10) ). So instead of me trying to explain any formulas I decided to add a few functions to the RigidBody class in JigLibFlash to make it easier for people to use.  I have created the following functions.

public static var toDEGREES:Number = 180/Math.PI;
public static var toRADIANS:Number = Math.PI/180;
 
public function pitch(angleDeg:Number):void
{
	SetOrientation(JMatrix3D.multiply(CurrentState.Orientation, JMatrix3D.rotationX(angleDeg*toRADIANS)));
}
 
public function yaw(angleDeg:Number):void
{
	SetOrientation(JMatrix3D.multiply(CurrentState.Orientation, JMatrix3D.rotationY(-angleDeg * toRADIANS)));
}
 
public function roll(angleDeg:Number):void
{
	SetOrientation(JMatrix3D.multiply(CurrentState.Orientation, JMatrix3D.rotationZ(angleDeg*toRADIANS)));
}
 
public function setRotationsDegrees(xRotation:Number, yRotation:Number, zRotation:Number):void
{
	SetOrientation(JMatrix3D.euler2matrix(new JNumber3D(xRotation, yRotation, zRotation)));
}
 
public function get rotationX():Number
{
	return JMatrix3D.matrix2euler(CurrentState.Orientation).x;
}
 
public function get rotationY():Number
{
	return JMatrix3D.matrix2euler(CurrentState.Orientation).y;
}
 
public function get rotationZ():Number
{
	return JMatrix3D.matrix2euler(CurrentState.Orientation).z;
}

You can copy this into the RigidBody Class within JigLibFlash (jiglib/physics/). Or you can click here to download a modified version of the RigidBody class to add to your JigLibFlash source. Once complete you can now use these functions from any standard JigLibFlash geometry object.

What you might notice is this source is missing a set function for rotationX, rotationY and rotationZ. I have included commented out version of my function in the source, but be advised that they are commented out because they can cause some weird results when rotating on more then one axis. You are free to use them, but you have been warned. I’m not a math genius so if anyone has any optimizations or additions please let me know.

These functions should hold everyone over until the JigLibFlash team has finished its rewrite of this project.  To read more about what the new syntax will be when completed, check out this recent post by drojdjou.
http://code.google.com/p/jiglibflash/wiki/New_API_Very_Short_Tutorial

To play the demo click here.

To get the demo source click here.

Update: As of April 12 (rev. 81), these functions are now part of JigLibFlash source, so you will no longer need to copy in these functions into your project. :)

Virtual Spray Paint – Part 2 DIY

December 7, 2008 by Devin Reimer

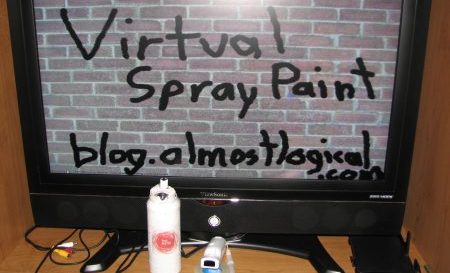
The Virtual Spray Paint experiment works by mashing many different ideas together. At the heart of it is the use of the Wiimote. In this experiment, two Wiimotes are synced to a computer using a bluetooth adapter. Using WiiFlash and WiiFlashServer, the Flash application reads information sent from the two Wiimotes. One Wiimote is placed into the mock spray paint can, which is used for a remote button press and for motion detection. The other Wiimote is positioned in front of the screen, pointed at the user. Mounted on top of the spray can is an IR emitter which the Wiimote near the screen sees and uses to detect it’s current position.

Continue reading for step-by-step instructions on how to build your own Virtual Spray Paint project, as well as the source code for this project.

Continue reading »

Virtual Spray Paint – Part 1

November 9, 2008 by Devin Reimer

Wii Virtual Spray Paint Live Demo

Virtual Spray Paint is a concept that I have been working on for a while and it uses some techniques that are based on concepts by Johnny Chung Lee.

It enables you to use a “spray can” to virtually apply spray paint onto a projected surface. Pressing the button on the spray can causes digital ink particles to appear on the background. The spray will weaken overtime until the can is shaken.

Continue reading for information on how this works and to see a video demo.

Continue reading »